“Forward In Faith Australia User Documentation”
Created: Feb 04,2020Version 1.0.+
Developed by: ICT Team
Email: webmaster@fifmi.org.au
Support: webmaster@fifmi.org.au
A guideline for content editors and administrators.
We hope you will enjoy working with our system.
Yours sincerely,
ICT Team.
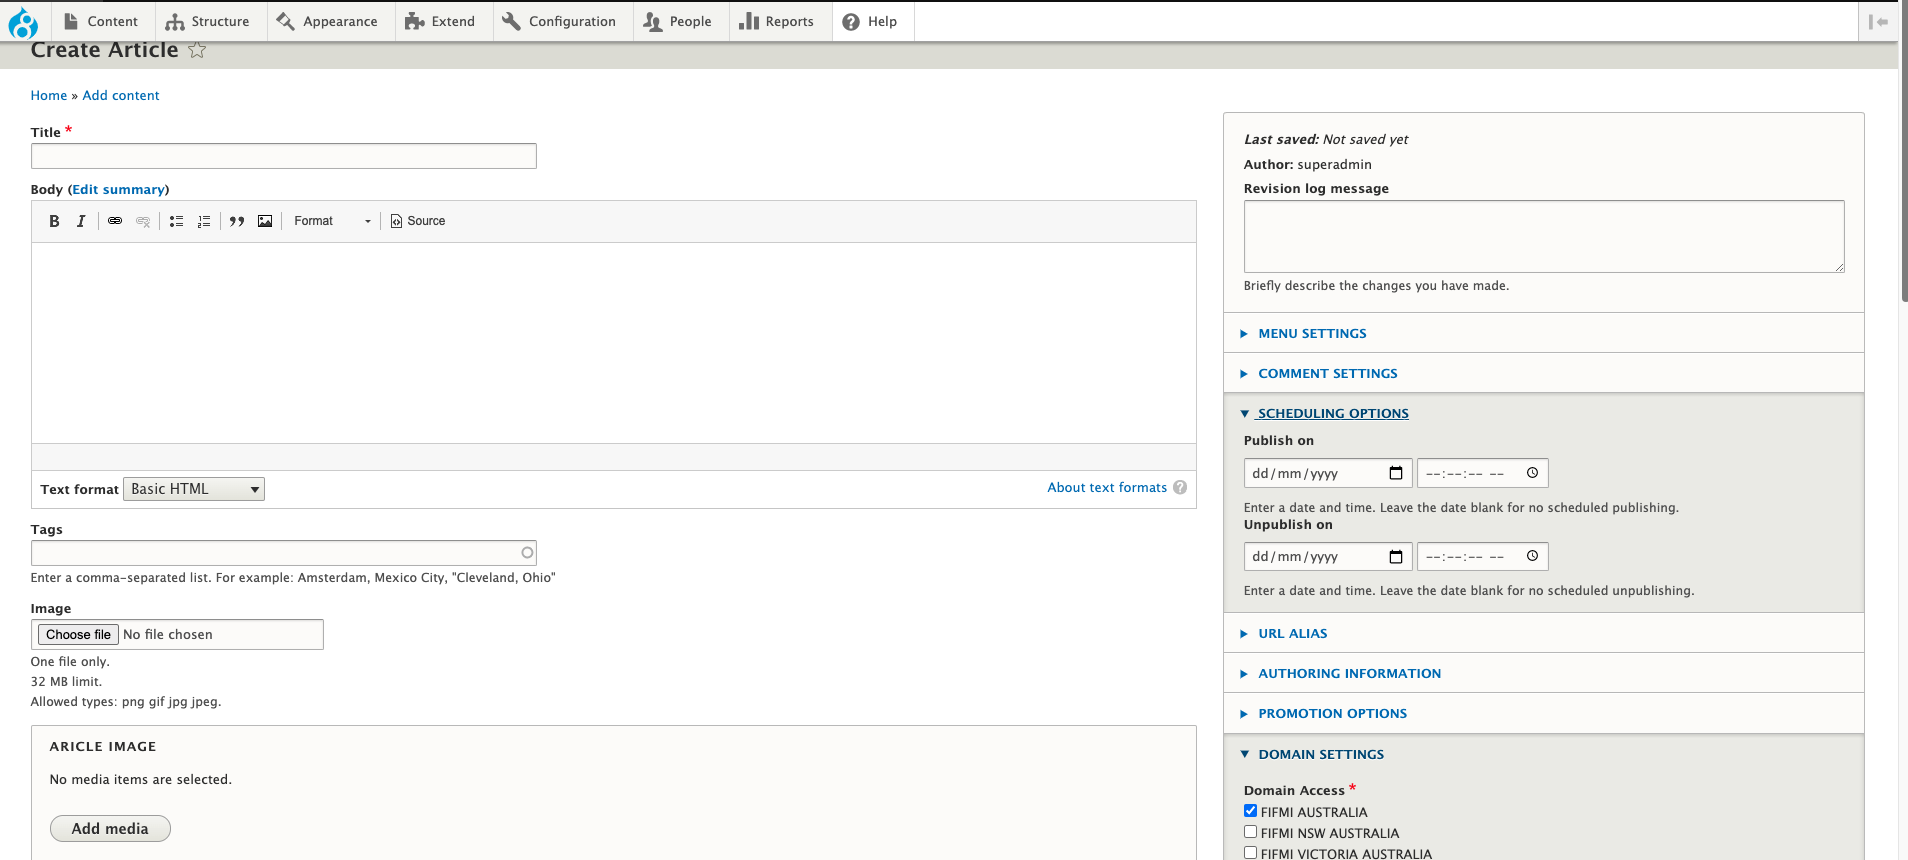
Adding Article
Just click Add content > Article entry and add your articles.
There are types below:
- Title: Title of Article
- Article Basic Image: image and thumbnail of Article
- More Content: More Content to beak between body and more
- Description: Short description of Blog
- Body: Body of Article
- Scheduling Options: Publish on date and unpublish date
- Domain Settings: The domain where the article should be posted you can tick multiple
- Published: TDefault is published hence if you want to schedule you should untick this
Adding Assembly
Just click Add content > Assembly entry and add your articles.
There are types below:
- Title: Title of Assembly in this case Assembly Name
- Body: Body not really required here
- Address: Address of the assembly
- Contact Name and Number: Contacts of the assembly usually the coordinating elder you can put multiple
- Author: Lists information of Author
- Domain Settings: The domain where the assembly should be posted or filtered you cannot tick multiple here

Adding Blog
Just click Add content > Blog Gallery entry and add your articles.
This is parked for now:

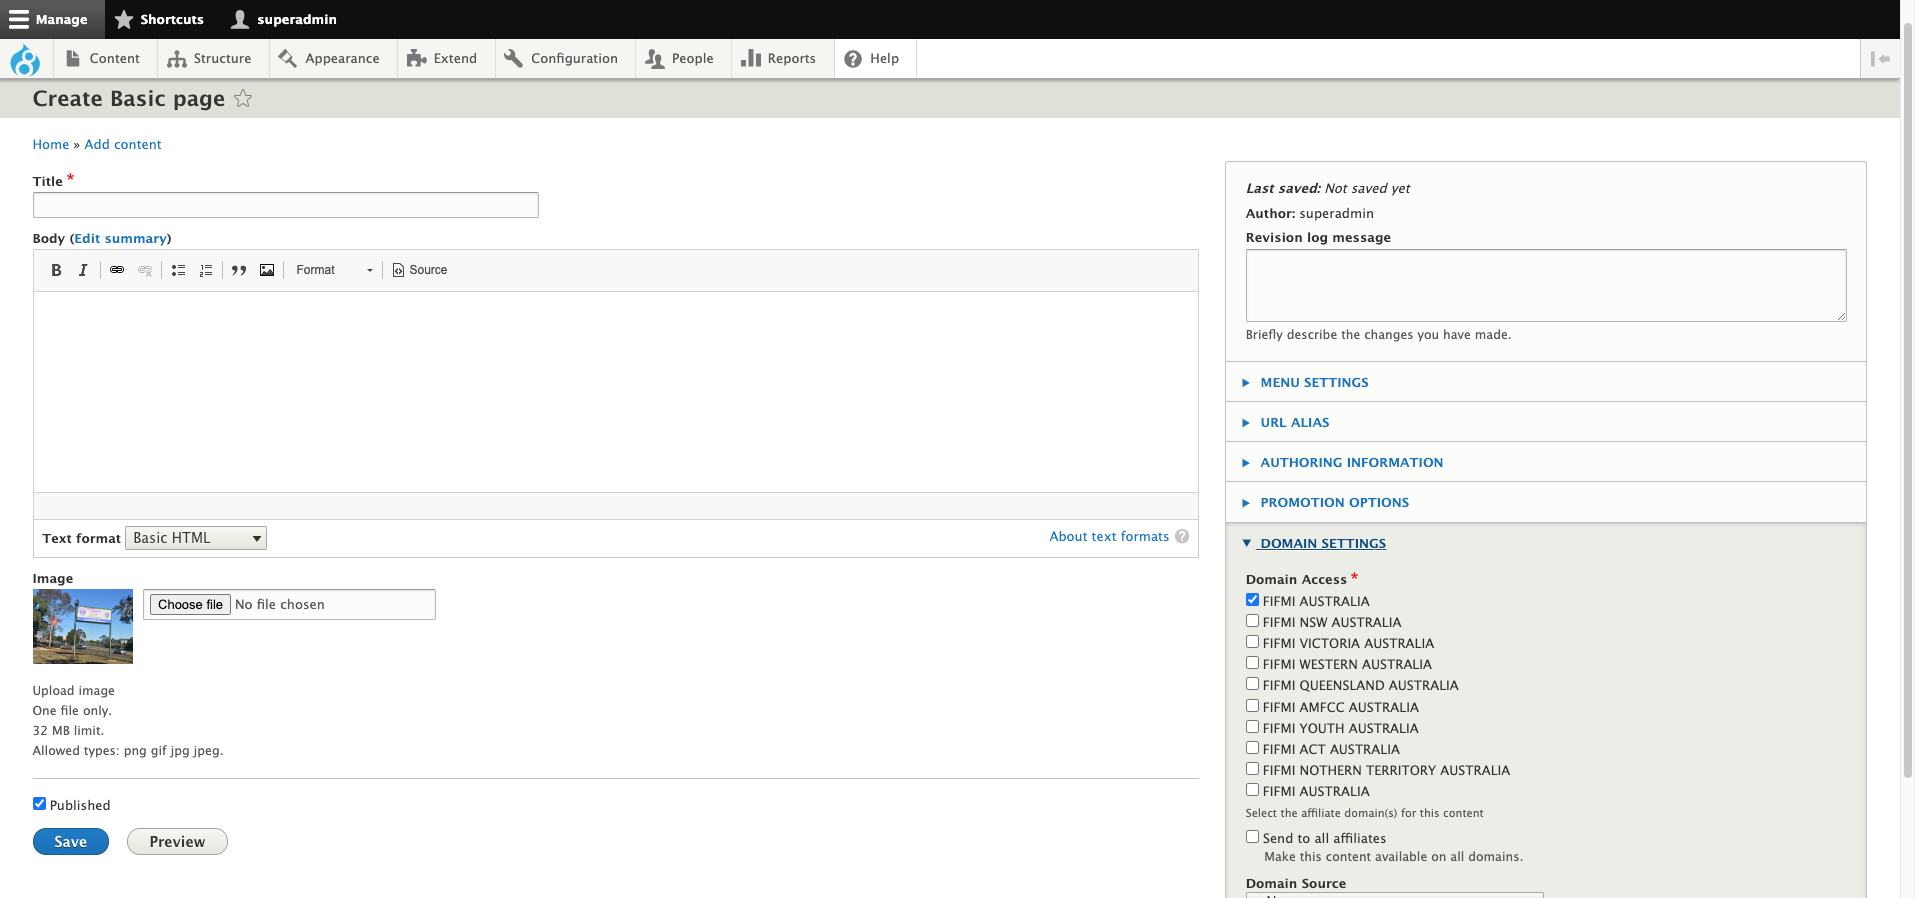
Adding Basic Page
Just click Add content > Basic Page entry and add your page.
There are types below:
- Title: Title of Page
- Body: Body of page
- Basic Image: image and thumbnail of Page
- Author: Lists information of Author
- Domain Settings: The domain where the article should be posted you can tick multiple
- Published: TDefault is published hence if you want to schedule you should untick this
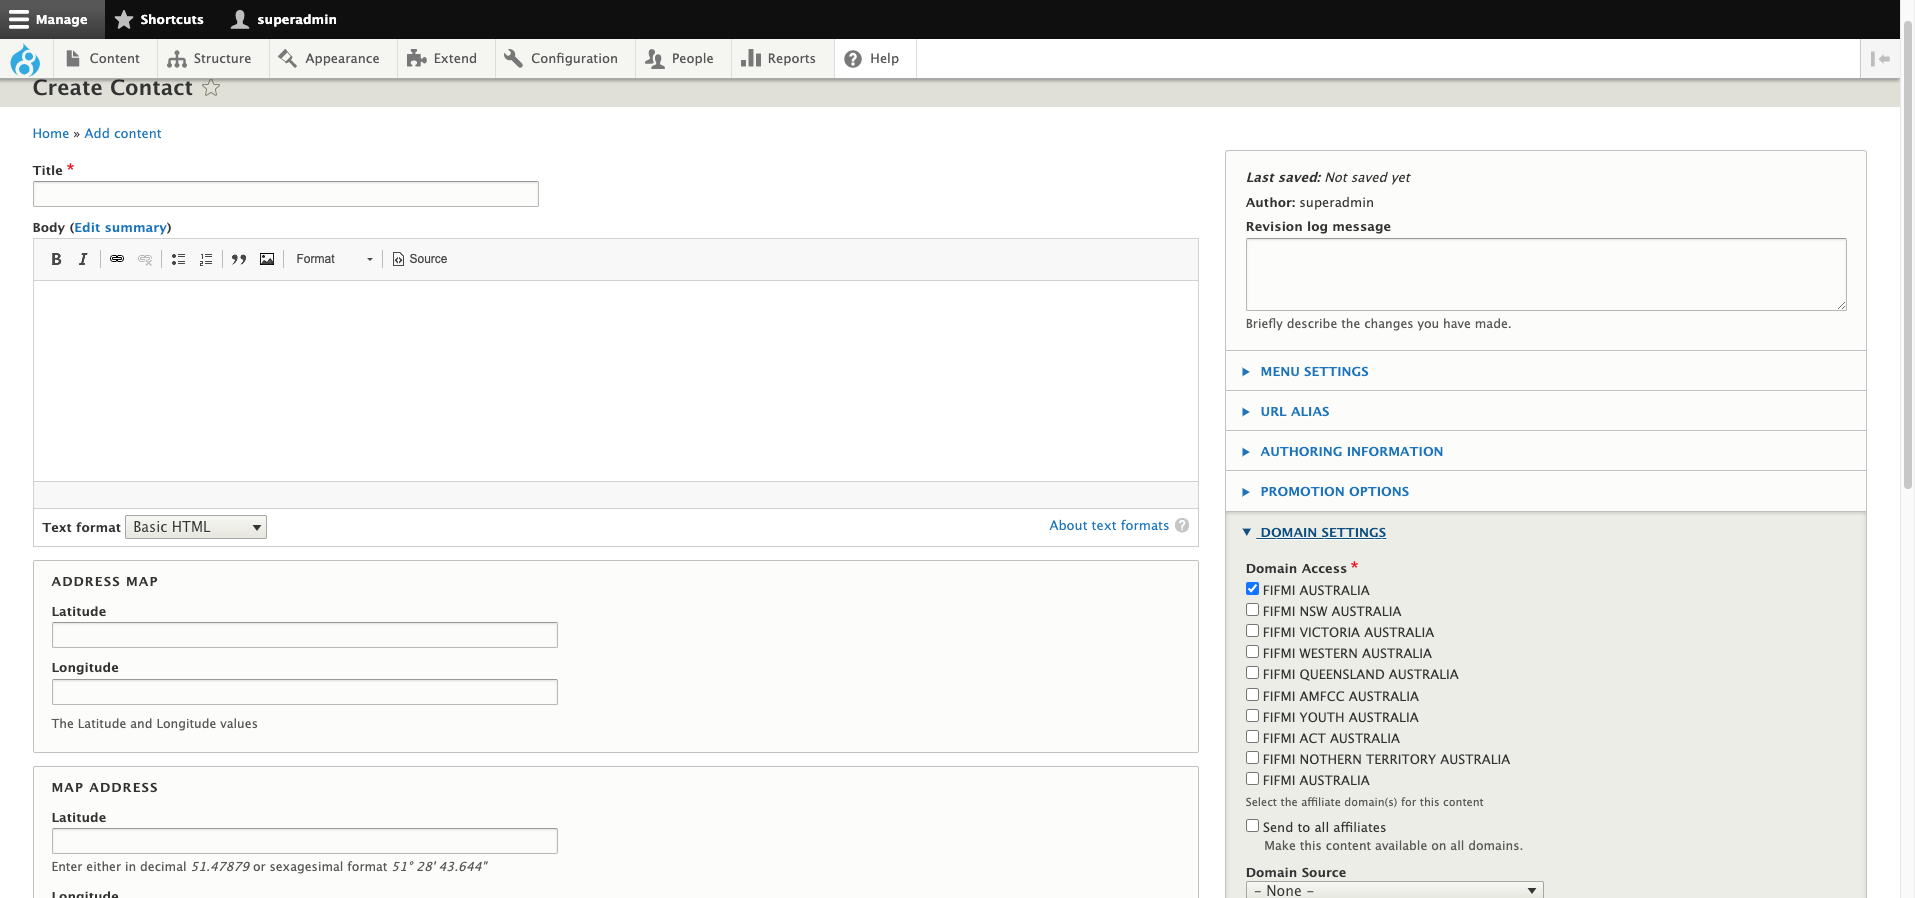
Adding Contact
Just click Add content > Contact entry and add your articles.
There are types below:
- Title: Title of Contact page
- Body: Body Of Page
- Map Address: Use Latitude and Longitude
- Contact Details: Address
- Global Contacts: Contacts of other assemblies this might not be required superceded by the assemblies module
- Domain Settings: The domain where the article should be posted you can tick multiple
- Published: TDefault is published hence if you want to schedule you should untick this
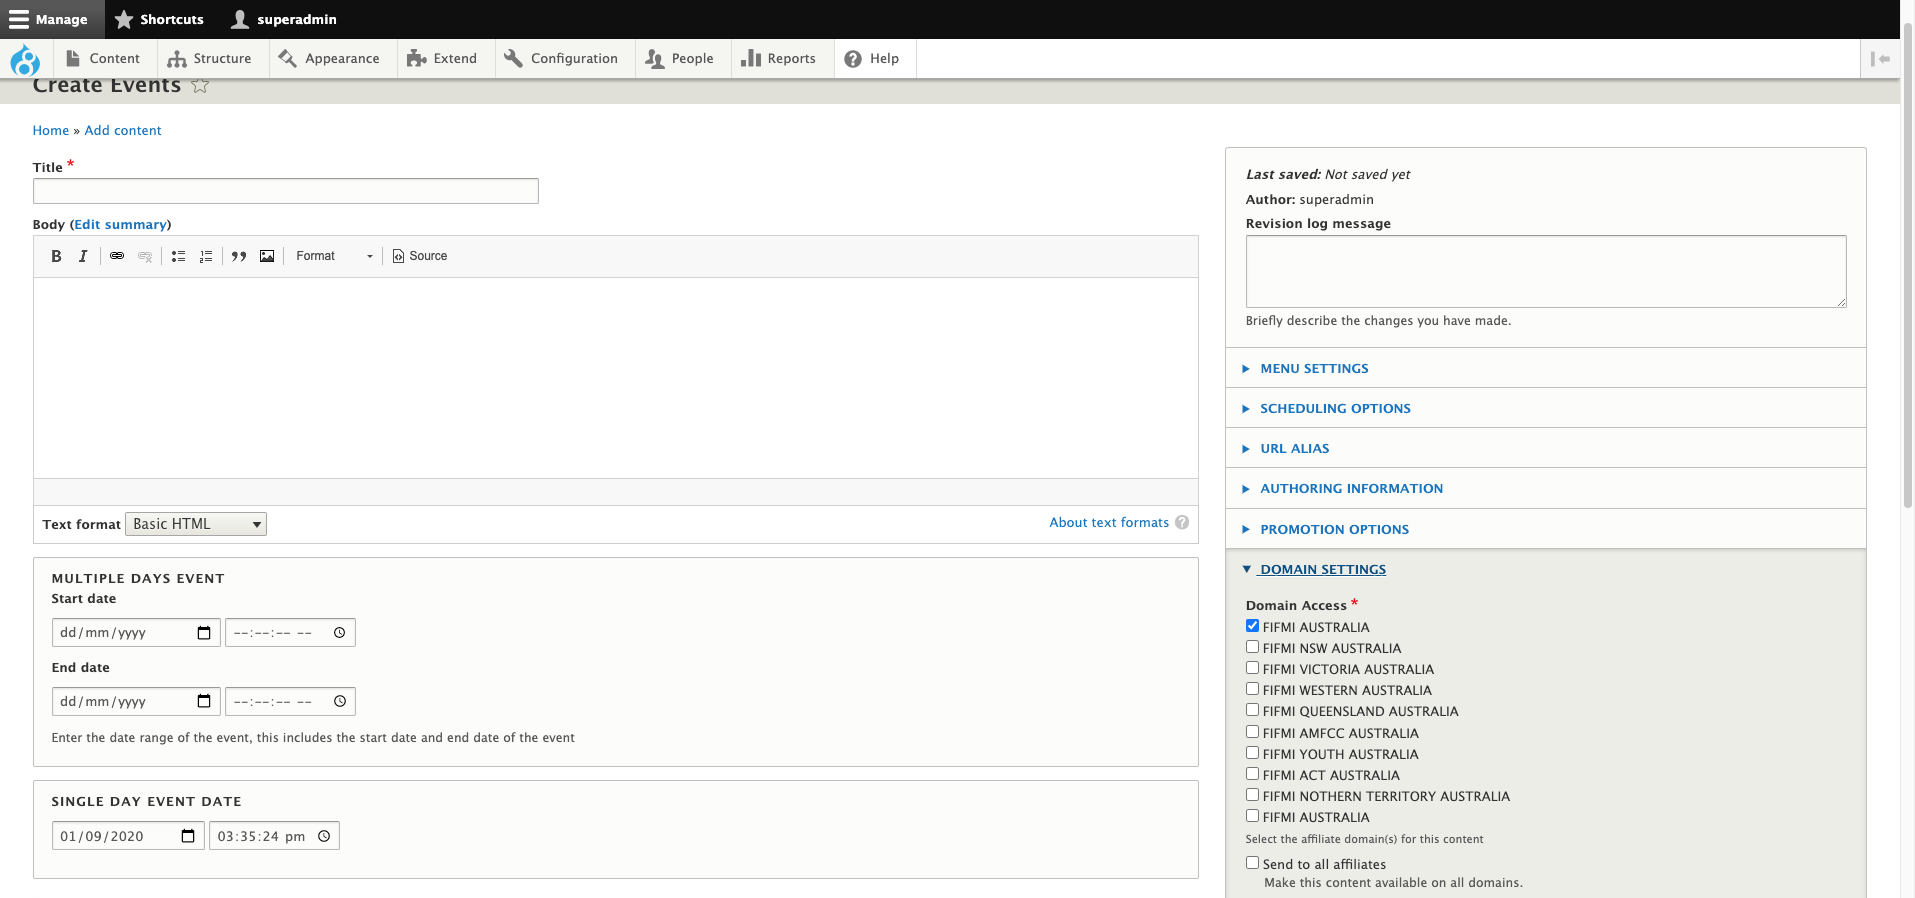
Adding Events
Just click Add content > Courses entry and add your articles.
There are types below:
- Title: Title of Events
- Basic Event Image: image and thumbnail of Events
- Multiple Days Event: Multiple days events
- Single Day Event Date: Single day event
- Venue and Address: Venue and address of event
- Event Information: Input information of Events
- Body: Content of Events
- Domain Settings: The domain where the article should be posted you can tick multiple
- Published: Default is published hence if you want to schedule you should untick this
- Scheduling Options: Publish on date and unpublish date
Adding Home Landing
Just click Add content > Home Landing entry and add your page.
There are types below:
- Title: Title of Home Landing
- Body: Not needed
- Domain Settings: The domain where the article should be posted you cannot tick multiple
- Published: Default is published hence if you want to schedule you should untick this

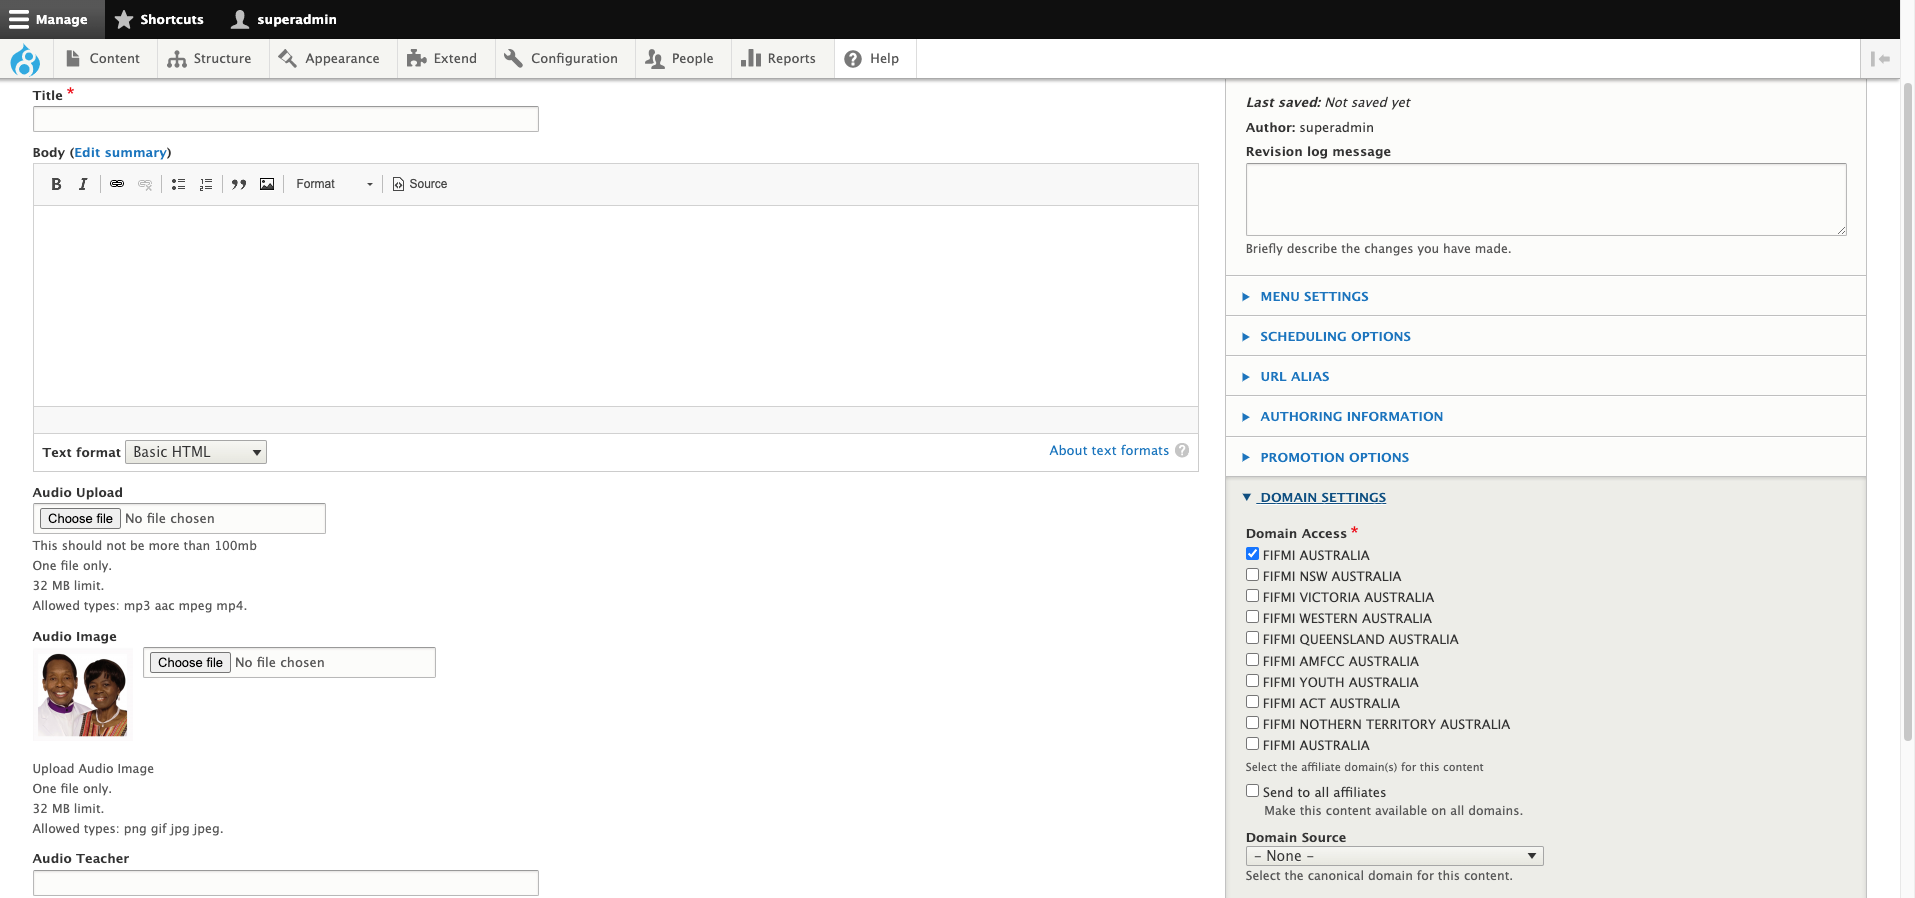
Adding Media Audio
Just click Add content > Media Audio entry and add your articles.
There are types below:
- Title: Title of audio message
- Audio Upload: The audio upload
- Audio Image: Image of the teacher/preacher
- Audio Teacher: Name of preacher
- Domain Settings: The domain where the article should be posted you can tick multiple
- Published: Default is published hence if you want to schedule you should untick this
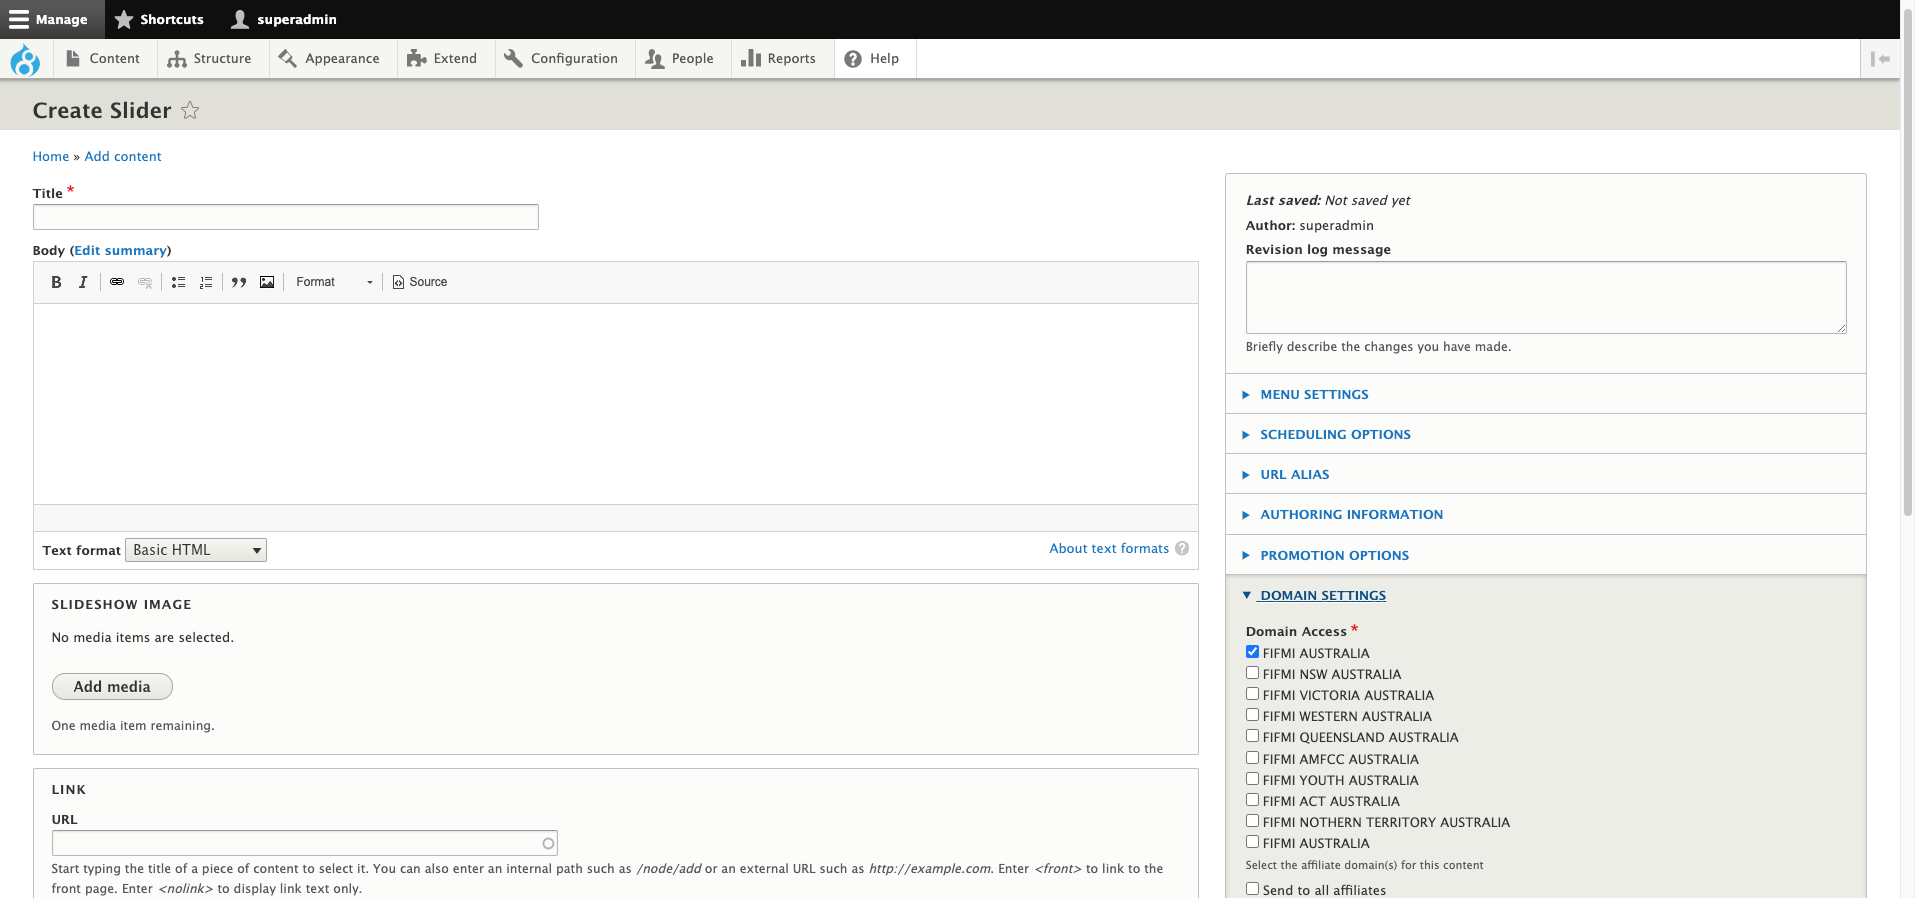
Adding Slider
Just click Add content > Slider and add your articles.
There are types below:
- Title: Title of Slider
- Basic Slider Image: The image upload
- Link: The link and the link text
- Domain Settings: The domain where the article should be posted you can tick multiple
- Published: Default is published hence if you want to schedule you should untick this
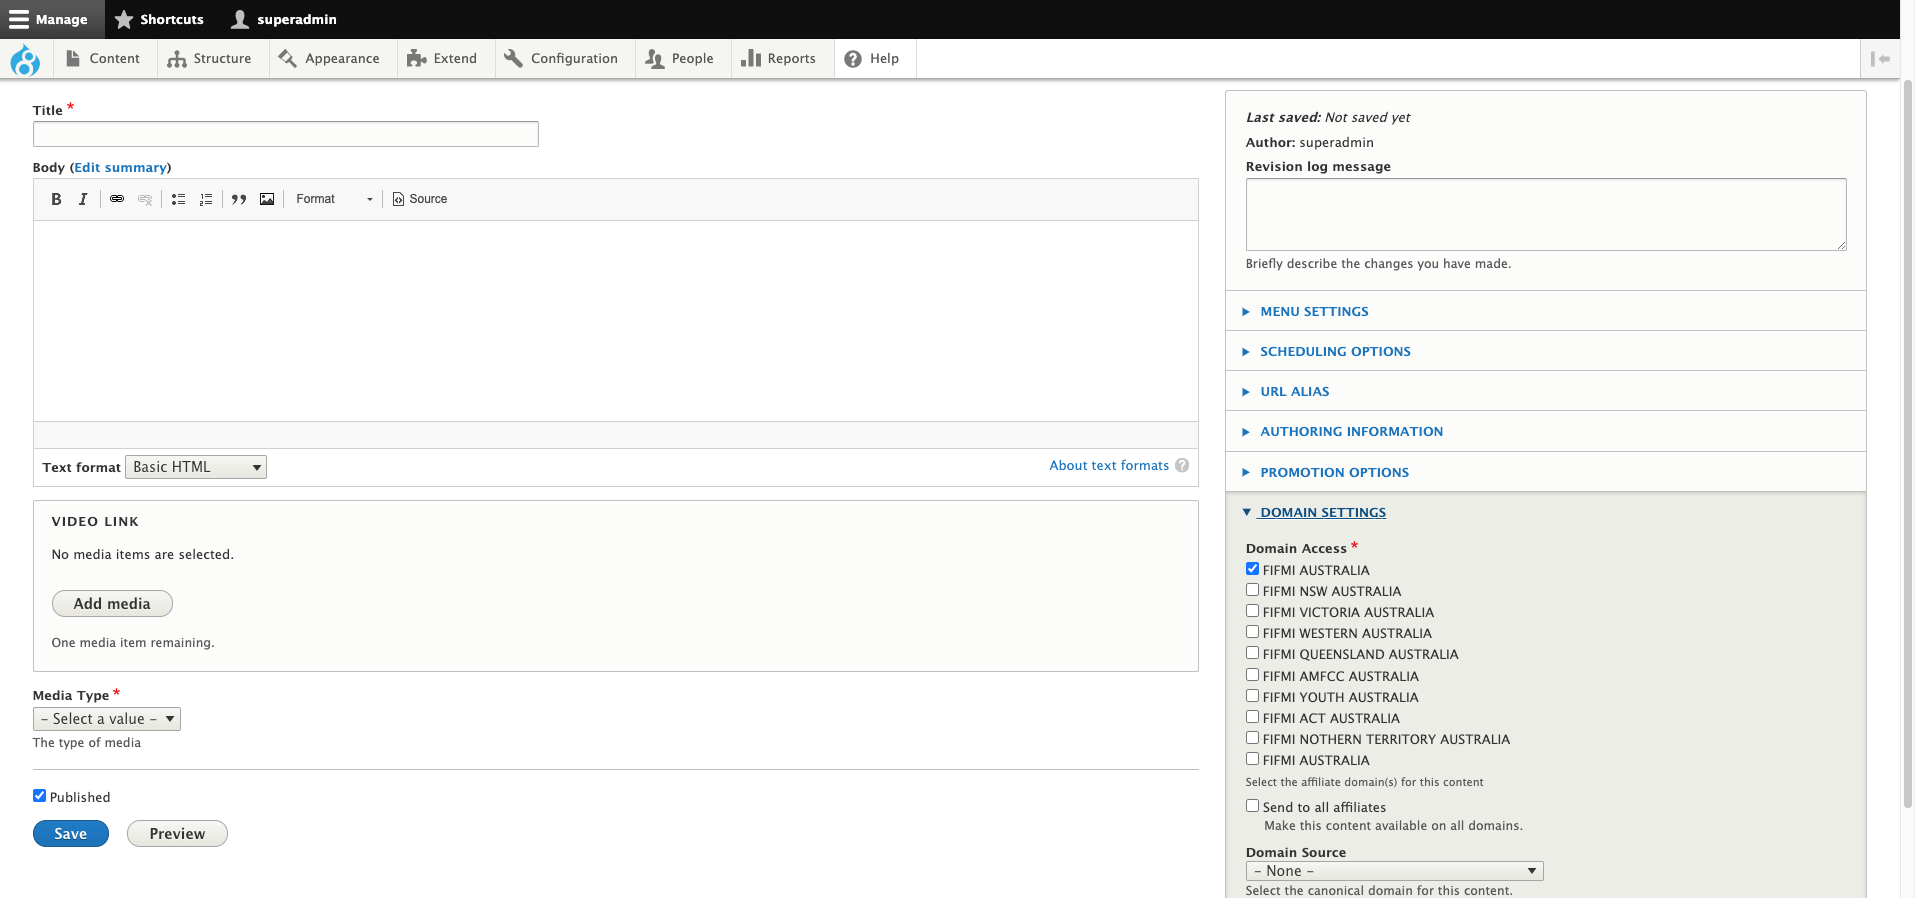
Adding Video
Just click Add content > Video and add your articles.
There are types below:
- Title: Title of Video
- Video Link: A youtube or vimeo link
- Video Type: Category in which video should be posted
- Domain Settings: The domain where the article should be posted you can tick multiple
- Published: Default is published hence if you want to schedule you should untick this